Tuesday, January 28, 2014

A New Reenactment Group and Lots of Recent Sewing Projects

Well I finished my thesis and had hoped to take a nice break. I ended up getting a week off before beginning the preparations for the re-enactment unit that Nic and some of his friends started recently, The Adelaide Regiment of Volunteer Rifles, 1862-1865. They wanted to create a group that was accessible to anyone to join as well as being progressive in its portrayal and research, with the aim of being as historically accurate as possible. Nic had spent a few months researching and we finally had enough information to begin work. We also had arranged to have our first big event in taking part in the Australia Day Parade in the City on the 26th of January. This left me with a panic attack and just over 3 weeks to prepare.

The first thing that I started making was the units flag. The Anglican Cathedral in the city had 3 existing flags of a similar design from later periods of the regiment, which were all of the same size and construction. From this we assumed that the flag would be one sided and 3 by 4 foot in diameter. Those flags had more decoration and were of differing colours. Thankfully, we also had the description of the flag from the newspapers at the time, which described the colour of the silk and the fact that it had no decorations.

After hunting around for the correct coloured silk, it was fully hand sewn by both myself and my friend Mandi.
The completed flag

Sergeant Davis bearing the flag during inspection before the parade.

I was also kept busy sewing the summer white cotton trousers for the regiment. I ended up sewing 3 pairs. Unfortunately, due to time and fitting restrictions, Lieutenant DeGroot's ended up a little too big and he was unable to wear them for the parade. Once I have recovered I will need to make myself a pair and a new pair for Nic as his bought pair are too tight.

I also had to 'Farb' up a banner for the group for advertisement. There is no historical evidence that they had one, but we did require it for parades and future events to advertise the group to the public. Especially as we often get confused as Civil War Re-enactors and the Foreign Legion. I ended up looking at photos of Victorian Parades and museum banners to create an idea. I then chose the font and printed the lettering from Word to create a template of how it should look. 

 Two sample letters and pieces of paper folded to work out the font size.
 The printed lettering in the desired size to check the layout.
 We also tried a few colour combinations for the lettering, which was made out of felt using the printed off templates to cut around. In the end we settled on the red with black backing. We are also thinking of adding the bugles later.
Mandi and Myself carrying the semi completed banner (depending on if we add the bugles or not) during the parade.

Finally, I had been promising to make Mandi a cotton middle/working class cotton day dress for attending events. She already owned a few amazing silk dresses, however, for some of the events that I invite her to it is more practical and appropriate to wear washable cotton. I was meant to have her dress made for attending the Barossa Goldfields last year. 


The completed dress is the one that she is wearing in the above photo. It has a fitted bodice with waistband and bishop sleeves. I also added a watch pocket into the waistband. The front of the skirt is flat with pleats and pockets with a dog leg closure. The back of the skirt is cartridge pleated. I absolutely love the dress. It is by far one of the best dresses I have made to date.

Monday, January 6, 2014

Catch Up and the Dreaded Mending Pile

Well I have finally completed my degree and my honours thesis. So now that I have taken a few weeks to overcome the trauma induced by stress and study, it was time to get back to my sewing.

After winning the war over my huge starching and ironing pile (the only negative to reenactment and historical costuming) I was left with a huge mending pile. My husband loves his period shirts and has worn many of them to death. He says that the wear and tear make them more period correct, but no self respecting housewife would let her husband out in those shirts (in my opinion). Nic has 5 shirts and every one of them required repairs. These repairs included button replacements, holes, tears, slits, worn cuffs.

I find that there are many different ways that I mend shirts. I am not sure how historically accurate they are.

Cuffs - Nic wears out cuffs a lot due to wear and washing (black powder colours the fabric and requires bleaching and scrubbing at times). On the first repair I slit the seam and turn it under. On the second repair I completely replace the cuff. By turning it under it extends the life with a lot less waste and work.

The top cuff shows the worn fold of the cuff. The bottom cuff shows it slit and turned under, I then whip stitch the seam closed. This is a quick and easy way to extend the cuff's life, but can only be done once as it makes the cuff thinner and is impeded by the buttonhole.


Under Arm - this shirt was made for Nic by his dressmaker before we began dating. The gussets did not line up and had no reinforcing. As a result of age and use it ended up with a huge hole in the undersleeve. It was too big for me to darn, so I whipped the edges to the sleeve under-flaps to prevent further tearing and fraying.


I also used this technique on a hole on one of the shoulders where the gap was too big for me to darn (I know that some people can probably do this, but I honestly find darning hard and tedious). 


General Tears -
While I do cheat on some holes, I will darn when it comes to slits that are easier to close. This is a nice little "L" shape tear on one shoulder that is about 1" (2.5cms long).


I have yet to touch on my own mending pile yet and I still have one shirt that I am continuing to darn against my own wishes. Maybe I should let you decide if its worth it. So far Nic has outvoted me and wants it repaired for use as a Napoleonic Private. I have currently only finished just over an inch of the darning. Its a big job.


The Challenge: #1 Make Do and Mend
Fabric: -
Pattern: - Year: Various - Napoleonic, 1830s, 1850s and 1860s
Notions: Cotton and Linen Thread, various buttons (bone, pewter and porcelain)
How historically accurate is it? Not sure
Hours to complete: Continuing, a little every evening
First worn: -
Total cost: thread and buttons from stash

Friday, November 15, 2013

1830s Sleeve Supports, Chemisette and Shawl-Mantlet

I have decided to take a quick break from my data analysis. While having a cup of coffee and cuddling Dinah, I had my photos displaying randomly as my computer screen saver. While watching I realised that I had sections of my 1830s outfit that I had not actually blogged about.

1830s sleeve supports
Even though my sleeves have a pleated upper arm, the puff under that still requires shaping. I did not need a large puff so I measured my arm and that became my length. More fabric could be added here, but I wanted it to sit without being held in place with cords (tying them into place with cords was more common in the earlier part of the 1830s, I could imagine that when the sleeves began to be tighter at the top they may have become uncomfortable). I then calculated how large the puff would need to be to support the puff fabric without stretching it out too much. I then toiled it and tried it out... making adjustments as I went. The larger piece is gathered around the fullness, keeping the section that will go under the arm flat and smooth.

 These are the final pattern shapes after toiling. The smaller shape is the inside and the larger is the gathered outside.
 An unfilled puff upside down
 An unfilled puff the right way round. I then filled the puffs with Cotton. To finish them off the ends, one end was folded into the other and it was then whip stitched down.

As you can see they are not very large, but still very effective.

1830s Chemisette

I love chemisettes and they tend to be an item that is often neglected by many members of the groups I am a part of. 4
  • They provide protection for your garment from sweat stains around the neck and collars. 
  • They are easier to clean than a dress. 
  • They provide a level of period correct modesty for day wear.
  • They are an easy way to change collars without whip stitching them directly to the dress.
  • They just look really nice.
Anyways, I was lucky in having access to the Attic Trunk 1830s chemisette pattern (these patterns were made about a decade ago by a lady in my state who has unfortunately passed away). This pattern was quite old and was in size 20 (im only a size 12). I also decided to do my usual trick of changing/adapting to my own taste as many undergarment patterns are very basic. I took my inspiration from two Chemisettes from the UK's National Trust Collection. These both have been dated 1840-1850, but the person would have had to have been very far behind the fashion for that to be the case. The collars have the standard width of the 1830s and the short waist of the 1820-early 1830s.


For mine I put three small 1/8" pin tucks on either side of the opening. It also has a cord string to close the neckline. The back is plain. The pattern had a basic collar, so I made a thin ruffle that I whip gathered on and trimmed with a lace edge. 

 Unfortunately, all of the photos I have wearing the chemisette are from the Port and it was very windy. I think that it really softens the dress off and creates a more romantic and gentle image.

1830s Shawl-Mantlet
The last item that I made to finish the impression was a matching cotton shawl-mantlet. These are an important outergarment of the time and come in a wide variety of shapes. They are not long and so they protect the sleeve from being crushed. I was amazed at how many exant cotton gowns still had their original matching capelette in online collections. I was provided with a basic pattern shaped off an original from a lady called Kay. She has a huge collection of exant garments and is wonderful at helping create authentic outfits. I toiled her pattern to fit me and then made it with the same cotton fabri as my dress, plain white cotton for lining and the same silk piping as I used on the dress. I also made my toile with scalloped edges, whereas the original only had a single scalop on the edge of each shoulder. I must admit they are very strange looking items and I doubt they would really provide your dress with any protection.

 On my Manequin, over the collar..
 
  Under the Collar

 ** When I get a chance to wear this I will take some photos and add them here. I have found that they always look nicer on a real person.


Thursday, November 7, 2013

Remaking A Well Loved Hat

My first hats was a straw hat made for my by my husband. He began my interest in costuming many years ago. He lovingly went out and purchased a straw hat and then shortened the crown as a gift for me. I have always loved and cherished this hat. In that process it has been worn a lot and in many different weathers and has for a while now been looking very sad.

In its first life it just had a simple black velvet ribbon to decorate it. Please excuse my dodgy outfit, it was my first.
Its second life 2009, decorated for a christmas parade... which funny enough we ended up not attending.
Then its third life 2010, no more silly flowers... but its very damaged from wear and rain.... the poor thing.

I did not think much of it till recently at the Barossa Goldfields when I saw how shocking it had begun to look. That was when I decided it was time for a fourth and far better life. 

 I began by whip stitching millinery wire to the brim. Leo was kind enough to test its strength and durability.
The crown also has lining which I removed to place buckram in and then refitted the lining to strengthen the crown. It really was very damaged from the rain. 

A friend of mine, Mandi, was wonderful enough to let me have some of her goreous black lace to decorate the hat. It is amazing how lucky I am in my friendship circles. They are always a source of help, advice and resources. Mandi was also amazingly helpful in helping me to decide on my trim and decoration. It is wonderful to have people that you can bounce ideas and photos off for honest opinions. If left on my own I was also going to put a curtain on it using the lace... but as pointed out it was bit too lampshade looking.
 As I had the gathers on the crown, I then covered this with some thinner lace.
I decided that I did not want to go floral and I had chosen my lining as a green shot with yellow taffeta (which was also given to me by a lady that I met at a tea dance) so I wanted to avoid flowers. Instead I found some dark red cherry clusters in my stash of trimmings. These are amazing little cherries as they are wax dipped. I also found to my amazement that I had some synthetic moire ribbon that matched the lining taffeta almost perfectly. I was very lucky in retrimming this hat.


To line the hat I bias taped the edges using tape I had made with the fabric. I then cut out a rectangle of fabric and pleated it and pinned it into place. It was then tacked on using cotton thread.

To finish the crown I put a bias tape over the edges of the pleats.

I am very happy with how the hat looks now and I hope that I will be able to enjoy it in its new life for many more years to come. 

 Me proudly wearing the hat at Urbrae House. 


... and just in case anyone was wondering my manequines have a wonderful feature where I can place removable hat stands into their necks. I dont often use the one on my female form, but they do come in handy when setting out an outfit the night before or putting full outfits on display.


Wednesday, November 6, 2013

1860s Cashmere Spanish Jacket edited with new photos

While completing my mourning dress I found a cut out cashmere Spanish jacket that I was making before my wedding. It ended up getting put away due to the wedding sewing requirements and then the purchase/moving into our own home. I finally finished constructing it last month. The original inspiration for the jacket was the painting Young Lady in a Red Jacket by John Tissot. Nic loves this painting and originally suggested reproducing it.


Amazingly, my mourning dress fits perfectly to recreate this image. I also have a stark white silk collar that I have never used in a cupboard.

I originally toiled and cut out the red cashmere for this jacket before my wedding 3 years ago. This makes it officially my oldest UFO. I used the Truly Victorian Spanish Jacket Pattern as my base with the sleeve caps as seen in the portrait. I did make a number of alterations, including ignoring the instructions (I'm not sure if they are correct or not, about 6 months ago I just stopped reading any commercial pattern), I extended the sleeves to fit my long arms and removed the fullness from the sleeve caps. The basic pattern caps are far too big and looked silly puffing out of the top with gathers.

The jacket was constructed using red cashmere, silk piping, red pom pom braid and over 30 meters of tracing braid (soutache braid)... so far. Also, I decided that due to the heat in Australia over summer, I wanted to make the long sleeve section optional. The long sleeves are constructed, but I have run out of braid to finish the design on the sleeves. As it is now the beginning of summer, I am not worried about finishing them any time soon.

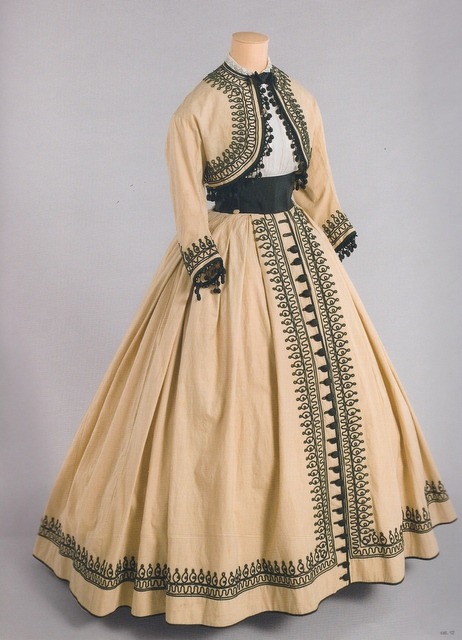
The painting indicates braid work, but was impossible for me to make out. To solve this issue, I used this dress as inspiration for my braid.

Using the braid, I made a practice shape and then traced it and worked out my spacing. As the fabric is furry, I was unable to transfer the design. Instead, I measured and placed dots at the cross over points. The result was excellent, even if not all perfectly identical. Sometimes I do damn the perfectionist within me.
It was not until I had completed all of the braid and edging that I finished the jacket off with the lining. As the jacket is to be worn at times over a black dress (when fully complete), I decided to line it in black cotton.

Once the main body was finished I had to repeat the process by starting on the sleeve. Construct, pipe, attach pom poms then apply the braid before lining and then fitting the sleeves. As you can see in this photo, the sleeves were far to big. It was at this point that I chose to reshape them. 

The completed jacket front.
The completed jacket back. 
Side View.
The decoration at the back of the neck. I intentionally turned the direction of the patten to create more symmetry. 
 For a closure I designed a braid pattern and then following guides online I made a clasp. It is small but works remarked well. I was really happy with how this turned out. As a side not when beginning and ending the braiding I would push a hole into the fabric using awl and then push the braid through the hole, so that the ends were out of sight.
 Center back completed braid. 

I think that overall this small jacket used well over 30m or about 33 yards of braid. I do still plan to make long sleeves that can be whipped stitched on during winter, but or now, I am very happy with how it looks.

I am adding these two photos of me wearing the spanish jacket. I have decided to clean up my blogs, so photos of events will now be posted on their correct blog accessible through my tabs.