Sunday, October 20, 2013

Urbrae House Vintage Picnic and Other Celebrations

This blog has helped me to appreciate how lucky I am. I am always finding inspiration from other bloggers and from the support and encouragement provided on this blog. When I started this blog it was my way of making a diary of my sewing and events that I would not loose when my computer crashes (which it does bi-yearly). This time of year is our busiest and I would not want it any other way. Summer is finally starting and we have been blessed with many interesting and fun events. These also inspire me to sew more. I am hoping to post a completed 1830s frock coat in the next week (fingers crossed) and start on an 1840s or 1850s sheer dress (Im still deciding on the design). I also have a few other bits and pieces that I have been making in the evenings, which I have yet to photograph and blog about (including my lovely new 1830s chemisette that can be seen in my Port Festival post).

The big news for the week is that Nic and I celebrated our 3rd wedding anniversary. This year the traditional gift is leather... so we had our first horse riding lesson. We were a little disappointed that  I was unable to learn side saddle, but we thoroughly enjoyed ourselves anyways. We finished the day with a tapas lunch and a Tuscan dinner. A truly spoilt and luxurious day.

Today we attended the Urbrae House Vintage Picnic. Urbrae House is my favourite historic house in Adelaide, followed by Kingston House. It is amazing and the volunteers are wonderful. We recently went to a Tea Dance in the Urbrae House Ballroom and it was hugely enjoyable.

Today we sat outside under the shade of a tree and had a picnic lunch, followed by a walk around the gardens and we finished by joining the tour of the house. It was great to again see some of the volunteers that we know and also a few of the Colonial Dancers that we have met previously at Balls. 

 Today, due to the continuance of the Port Festival and the heat (33C which normally does not bother me except that it has been cold up till now so it has been harder to acclimatise) we only had a few people in attendance.
 Left to Right - Me, Nic, Ben, Kelly, Sandy and Mandi.
I was very happy at how my work dress fits wonderfully over my largest crinoline (at 123") and raises itself up to a perfect height for walking in gardens. You may also notice my sun hat (another item I should photograph in detail). It was becoming shabby from use and rain, so it has now had a face-lift and is looking gorgeous (or so I believe anyways).

Saturday, October 19, 2013

Port Festival 2013

Today Nic and I attended the Port Festival. This event is held every second year to celebrate the founding of our port (by our White/English settlers) and the boats that they arrived on for the first hundred years of settlement. The event organisers invite the society members to attend in 1830s clothing (or up to the 1860s) to represent the first white settlers and add ambiance to the day. The organisers close off a few streets and set up vendors of local Arts and Crafts as well as performing artists. The Railway Museum, Maritime Museum and Aviation Museum also open their doors to the public with free admission during the festival. It is always a very enjoyable day of wandering around the amazing old stone buildings and meeting lots of wonderful new people. This year they also had two of Australia's Tall Ships in dock, that members of the public could board for a small gold coin donation.

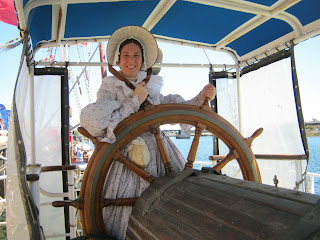
This year I wore my circa 1838 cotton dress with straw bonnet, to represent a middle class woman visiting town for the day. Due to the heat and my inability to still complete his woolen frock coat (fate we think as it was 31C today), Nic wore his 1830s-1840s bush garb and was also very comfortable. 

 Me and Nic at the helm of the One and All.


Nic on an old steam train at the Railway Museum.

Sunday, October 6, 2013

Regency/Napoleonic Short Gown


A long time ago I started researching a more period correct lower/working class Napoleonic impression. After some help and advice I made my skirt, petticoat and 2 shifts at the start of the year. The skirt and petticoat are earlier and dated to use with my 1790s impression, but I plan to use interchangeably. There are also some amazing research articles on trade and fabric quality/durability at the end of the 18th Century. Later on, I plan to make an earlier short gown for the 1790s impression.

After a lot of research I was amazed at how many types and styles there were. Online I found extant short gowns from the UK, Sweden, Holland, France and America. In Paintings, I even found them in Australia. It was also interesting to see how they changed to imitate the fashionable dress shape in the neck and waist lines.

Given the amount of inspiration, I finally decided on a short gown design. I used some from the Meg Andrews Auction Website and some from the Nederland Openluchtmuseum, to name a few.

Meg Andrews 1800
Meg Andrews 1820s
Nederland Openluchtmuseum
I must confess that this blog entry is long over due. I began sewing it in July and finished it in September this year. Unfortunately, I have been too busy to photograph it or blog about it. As I do not have a pattern I drafted it from scratch using my regency toile. I went through a number of trials till I managed to get it to work. It is fully hand sewn and I am very proud of it.

Thankfully, Mandi came over to visit and offer me some artistic support today. While visiting she took these amazing photos for me. I normally hate photos of myself as I am not photogenic, but these are wonderful so I have posted more than I normally do.


 It is very comfortable when working in the garden. Unfortunately, we have recently had some very strong winds that have caused a lot of damage to my vegetable patch, including my tomato climbers and my baby mulberry tree.
 Isn't Dotti cute, she loves a cuddle and walk.

The inside has drawstrings in the center to adjust the gathers. It closes on the top with a pin. The middle is held closed using a string on the outside which ties in a bow at the center front.

A Very Late to Post - 

The Challenge 16# Separates

Fabric: 100% Roller Printed Cotton
Notions: Cotton Tape, 1 Brass Pin, Cotton Thread
Pattern: None
Year:  1800-1820
How historically accurate is it? I think it should be fairly acurate. It is completely hand sewn using period correct stitching and construction techniques.
Hours to complete: About a month by stitching on the bus and at events including the Art Gallery (a very inspiring place to handsew)
First worn: Today
Total cost: The Cotton Fabric was $15 and the notions were from my stash, but probably totaled about $3.

Saturday, October 5, 2013

More Knitting 1862 Godey's Garter

After my success with knitting a sontag I decided to try something new/else. I also found a garter pattern from World Turn'd Upside Down for an 1862 garter pattern from Godey's Lady's Book. While I was researching I was talking to Mandi and she wanted a stripped pair. So of course as I am now an expert knitter (I wish) I agreed to take on the challenge for her birthday. While I did finish them, I hated all the threads I had to sew under to change the colour. They do look amazing for the effort. I am currently half way through sewing a pair for myself, but mine are blue with white ends. I am also thinking that these would make an excellent christmas gift as they are easy and fast to make on the bus.

 The Garters laid flat.
 The finished garters 
I also found a new use for them... when I left them on the couch my little boy got one over his head. I think I will make him his own next. He hates sitting still for photos and was grumpy after I took his new toy away. Thankfully he isn't as evil as he looks.

Historical Knitting 1860s Sontag Style

I recently decided to try something new in my historical clothing journey. Accessories is an area that I have wanted to focus on for a while now, but I have been busy with making the basics of a wardrobe. That is a time consuming process when dressing for different periods. It has always upset me that I still do not  have a fully finished mid Victorian outfit and accessories do make an outfit.

I have been focusing on researching outerwear and found many photos of women wearing sontags. While I have read blogs about how many people wear these in the states, I had never seen one worn in Australia. I am not sure if this is because my group represents a more social elite or because most of our events are in summer. It seemed perfect for me, however, as it gets very cold where I live in the hills. It was also a great idea as I could knit it on the bus on my way to university.

There was one problem though, I didn't know how to knit. I showed the January of 1860s Godey's Sontag pattern on Ragged Soldier to Jessie and she was kind enough to give me a basic lesson in knitting. I did have problems with working out what needles and wool to use. It turns out that UK, USA and Australia have different needle sizes. This was very frustrating for a beginner. In the end I used 4mm needle with 8 ply wool. To finish it I used two rows of single crochet (this is double crochet in the USA, so another conversion issue) and then a shell boarder to finish it. Jessie and a friend of hers also taught me how to crochet. To finish it I googled how to make dorset buttons. I did not feel that any other button would be suitable.

This was a great learning project and I hope to continue developing both my new skills. Thankfully, I keep getting told I am a fast learner so it only took two weeks from start to finish.

 The finished sontag laid flat
 Front View Tied Up
 Back View Tied Up
 Close up of the Dorset Button
The crocheted tie and tassel

It is very comfortable and easy to wear. I am now collecting CDVs and dreaming of the next one I plan to make, so watch my knitting space... 

The Challenge 20# Outerwear 1860s Sontag

Fabric: 100% Wool in two colours, 4 balls of tan and 2 of dark red
Notions: Bone Ring for Button
Pattern: Godey's Ladies Magazine and Ragged Soldier
Year:  1860
How historically accurate is it? I think it should be fairly good. I tried to keep the dye choices natural based. I am not sure about the crochet shell boarder though.
Hours to complete: Two weeks of bus rides
First worn: 22nd September
Total cost: The wool was about $35 in total

A New 1860s Work Dress

I have been very busy with my university studies over the last few months. While I have slowed down on my sewing I have not stopped. I have, however, not been able to take many photos of my work as I have had to make the most of my free time. Normally, I use events as an opportunity to photograph completed items, but I have not been attending as many. As a result, I will probably just flood posts as I get a chance to photograph them. 

A while ago I fell in love with the sleeves on this dress from the Philadelphia Museum of Art. Mainly I really love the sleeves. I like that this dress tailors in the top of the bishop sleeve to streamline the look more.


For our second wedding anniversary Nic purchased some beautiful blue cotton to make a new dress for around the house and the fabric seemed perfect to make a dress with these sleeves. It took longer to make than anticipated as I had to toile a new bodice from scratch. While I was unable to take construction photos, I have some completed photos showing the fastenings.

 For this dress I decided to use a dog leg closure. I also intend to add pockets at a later date to make it more usable and practical. This is also the first time that I have put the hooks under a placket and the eyelets into the seams. I copied this form of closure from some originals on 'All the Pretty Dresses' blog, which is an excellent and drool worthy resource.
 The sleeve cap was fairly simple to draft as it is fitted into the arm hole. It is piped on the top and the bottom and is lined in white cotton to provide strength and assist it to sit nicer with the weight of the bishop sleeve under it. 
 The bishop sleeve is a basic bishop sleeve that has been drafted straight on the top and curved at the wrist (to create the puff as the bottom) and is box pleated into the sleeve cap (for lack of a better descriptive word).
 It was then gathered into the wrist band. I went a little extravagant and used some decorative metal buttons I found in my stash. Sometimes its nice to have a little bling... even in the 1860s.
 The skirt is hung from the waist and attached by whip stitching into the back of the piping. I have pleated it into double knife pleats (a second smaller pleat behind the larger one seen from the front. The raw edges of the skirt fabric has been left untreated.

Finally the back of the dress. It sits a lot smoother on me than my mannequin, unfortunately it is in need of some serious re-shaping. I have made this dress a little bit bigger than I normally fit my dresses. As it is for around the house I wanted it to be comfortable. It is also shorter in the skirt, so that I can wear it with a 90" crinoline (if I ever find the time to make it), but mainly with just petticoats. As with all my skirts the bottom is hemmed with cotton herringbone tape on the bottom edge and bag lined in white cotton.
Photo taken by Darren Williams of Mandi and Myself.

If you have read my previous posts on events this dress has passed the usage test. So far I have sawed logs and been camping, which involved cooking over a camp fire, dishes and laundry. I also wore it when pulling down the encampment. 
 Sawing wood at the Barossa Goldfields
 The back at the Goldfields
Cooking at Taminick... not the best photo, but Nic only took 2

Finally, I am very happy with how the dress turned out and I look forward to wearing it more in future.

Tuesday, October 1, 2013

Taminick 2013

This year was another amazing weekend at Taminick. 25 years and going strong, with an amazing turn out. This year also heralded the return of the regimental dinner (a tradition that was last held the year before I began attending).

 Our campsite this year was a lot bigger. Nic and I had the bell tent and Danee (a private in our unit) the wedge. We also set up our awning with the back dropped. It was strange having the extra space and luxury. The South Australian Volunteer Rifles were never an active military group. The records of their encampments are few and entertaining, including on one occasion where by 11pm they had all gone home and left their tents in situ and returned in the morning. From the photos we have found they seem to have been the 'glampers' of the Victorian era.


 On parade for the raising of the flag on the first morning.
  Nic wore his Captain's uniform. This meant that he took a place with the officers at the flag for the ceremonies. I must admit it was a proud moment to see my man standing tall in a position of honour.
 To celebrate 25 years the soldiers grouped together for this great shot.
 This year I decided to experiment with cooking treats. I dont know why I thought I could bake on a fire, when I am hopeless with an oven... but other than some slight burn marks the cakes were nice and as far as I know Nic, Danee and the Civil War soldiers we were camping next to are still alive.
 Nic and Danee at the start of the Phil Hill Shoot. This is a shoot where they have to run in their pair to marked spots up a hillside and take turns to fire at and hit each numbered target and then run back to the start while being timed. This is one of my favourite events to watch. 
 Nic aiming at target number 2

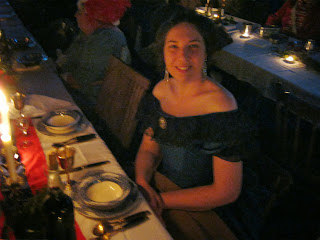
 Me at the regimental dinner
 Nic at the regimental dinner
 Group Firing in a Line
Individual Firing Down the Line