
For my wedding I have chosen to sew a version of a wedding dress that I fell in love with from the Godey's 1861 Wedding Fashion Plate. I plan to make the middle dress with the model that is sitting down.

I sourced the silk called Romance from a friend who is a seamstress and corset maker. It is a pink shot with blue so it has a lovely brown shadow.

The lace is 100% cotton embroidered English netting from

21 cm (8 1/4") wide lace for the flounce

1.5 cm (5/8") wide lace for sleeves and ruffles
Skirt Construction
The skirt is made of 3 drops of the 1.4m (4.6 ft) wide fabric cut at 1.4m (4.6 ft) long. I sewed the panels together at the selvage. The waist band was double box pleated. The waist band is 2.5cm (1") completed. The inside of the waistband was hand sewn.

Box Pleated Waist

Opening of Skirt and Placket
Skirt Ruffles
To construct the skirt, Wendy (as my arm was still broken) cut 25 panels 24cms (9 1/2") deep and the fabric size of 1.4m (4.6 ft) wide at the selvage. These were sewn into 5 ruffles of 5 panels at the selvage. The lace was attached by machine and then the hems were hand sewn by folding under 6mm (1/4").


The ruffles were then narrow hemmed on piping cord. The piping cord was gathered in the hem, to fit the circumference of the skirt. The layer was then pinned into place and hand sewn.

The second of 5 ruffles to be attached.
Over-Skirt Construction
To construct the overskirt I cut 3 drops of fabric 76cms (30") long. I placed two together and sketched out a curve and cut off the fabric. I attached these two curves to the uncut piece on their longest sides. I gathered the long lace and then machine sewed it to the overskirt. I then pressed the hem under 1/2cm (1/8") twice and hand sewed the hem the same as with the ruffles. For the waistband I gathered the fabric and machine sewed it to a 5cm (2") waist band with horsehair on the inside of the front piece of the waistband to stiffen it. I machine sewed the front and back waist band pieces together and then hand sewed the waistband closed.

Gahtered waistband attached to the horsehair and front waistband piece.

Hand sewing to close the inside of the waistband.

Completed Over-Skirt
Bodice
The bodice was created using Heidi Marsh's Blouse with Fancy Sleeves. The pattern pieces went together well with only a few slight alterations to the fitting and waistline during the fabric pattern stage. I must confess that the instructions to this pattern are minimal, however I rarely found the need to refer to them thanks to my prior experience and advice from historical seamstress friends. The only piece I had to make was the front facing, which is probably due to the way the pattern is long and flat cut allowing room for creating a flat waist or pointed as required.
I made the bodice from the silk with a medium weight quilters homespun cotton for the lining. The piping was made using the silk cut into bias strips and size 0 cording. I piped ever seam except the shoulder seam as I find that piping that seam looks a little strange. The bodice was fitted with 11 metal stays, which were fitted into the front facing in the front, seams in the darts and placed into cotton bias tape covers on the sides and back seams.

Front of the Bodice

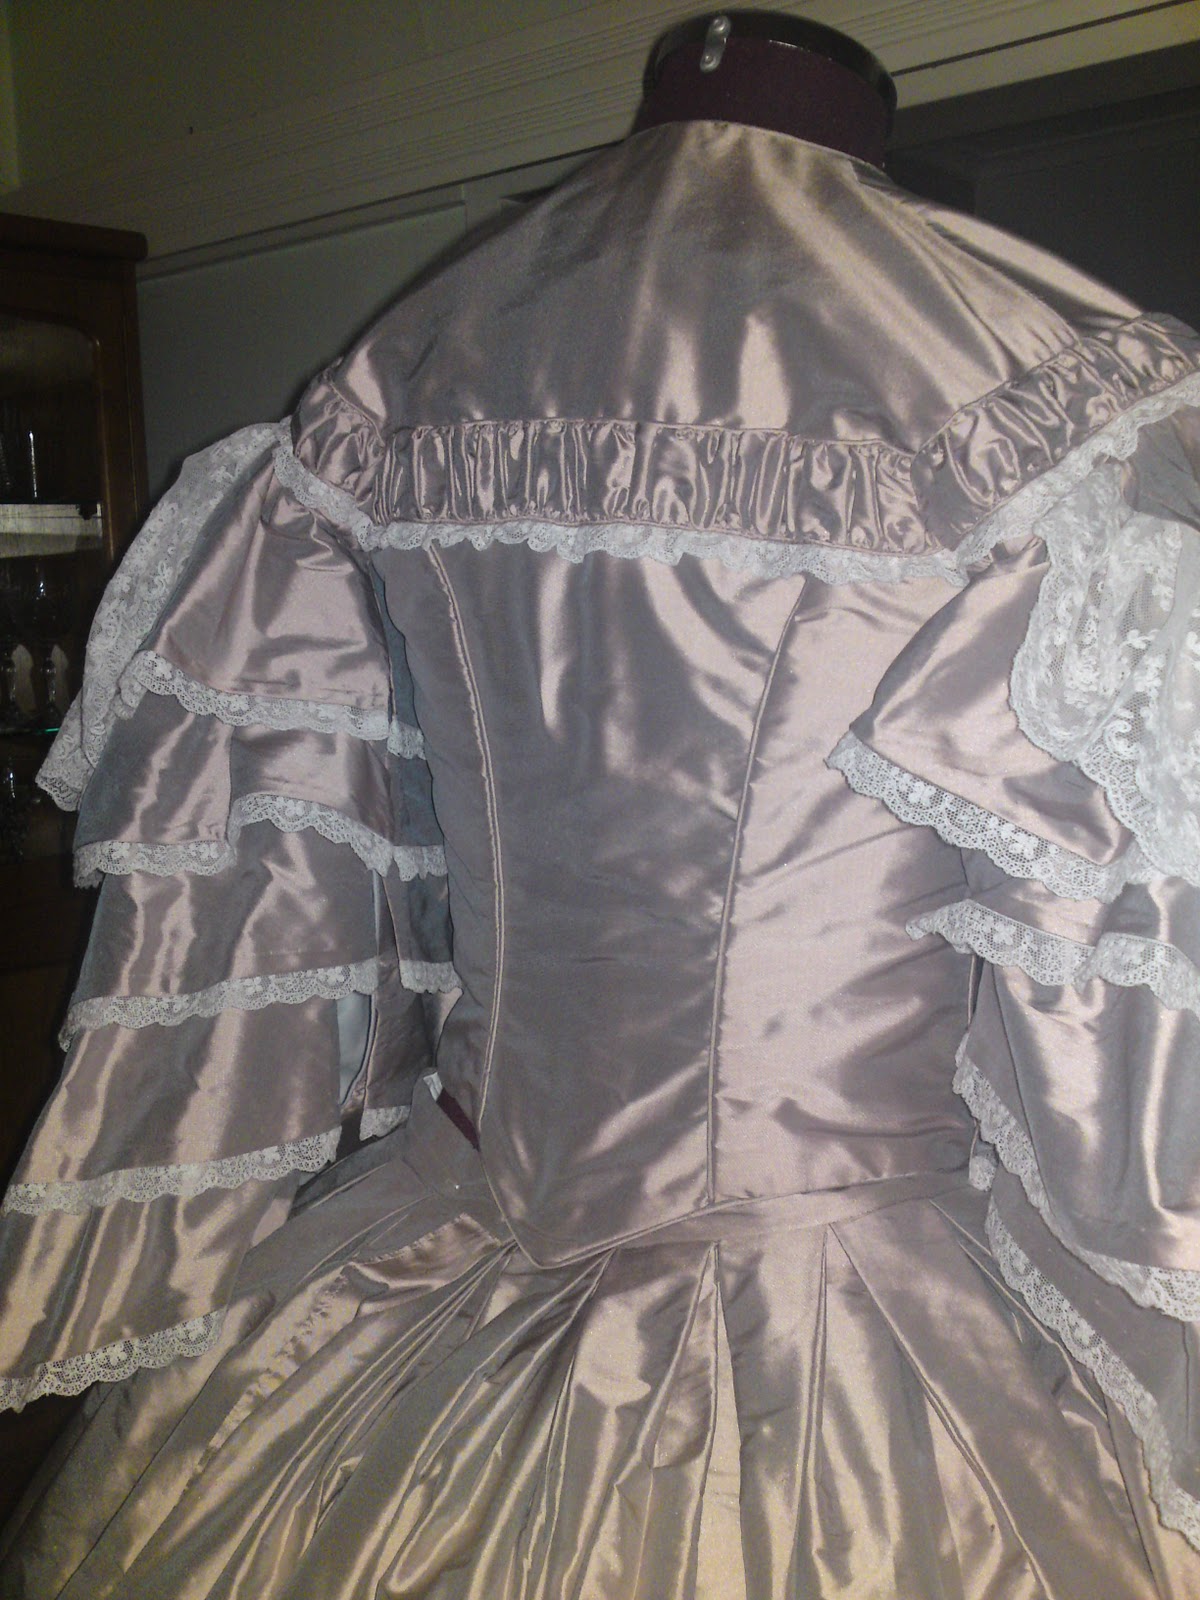
Back of the Bodice

Back Lining

Front Lining
Sleeve Construction
The sleeves were made using the same pattern as the bodice. I made a cotton fabric pattern of the sleeve first to ensure the fitting and construction. The ruffles were made using the same construction technique as the skirt ruffles. The bottom of each ruffle had the lace attached and then was pressed and hand sewn into a narrow hem. The top of each ruffle was hemmed over piping cord and then gathered at the top and pinned to a cotton lined base sleeve. There are 5 ruffles, but only 4 are gathered on cord the top ruffle and sleeve jockey are gathered and tacked to the top of the sleeve base. The sleeve was then gathered and fitted into the piped sleeve hole in the bodice.

Ruffle pinned to the base sleeve

Completed sleeve with ruffles attached to the base sleeve

Sleeves attached to the bodice,
the sleeve is actually very heavy and pulls on the manequin.
Bodice Decorative Trim
To decorate the bodice I did not want to use as much lace as in the illustration as this dress has the ablitiy to become over done. Therefore I cut strips of silk 4cms (1.5") wide plus seam allowance. I gathered it on both sides and sewed it to piping that I had made. I then gathered some of the thin lace I had left over and sewed it to the bottom of the gathered piping. I then hand sewed the trim to the bodice. I had the buttons covered with the silk on metal shanks. I hand sewed eyelet holes and pushed the buttons through and used satin ribbon to hold the buttons in place. This is copied from original bodices in a friends collection.

Eyelet hole for the false buttons.

The back of the eyelet holes showing where the metal shanks are held in place with satin ribbon.

The front of the bodice showing the trim and false buttons
Back of the completed bodice with trim.
Undersleeves
I constructed the undersleeves using a matching silk organza, which was cut to my arm measurements. I make ribbons using the organza to tie up the cuffs. The undersleeves have a satin ribbon drawstring at the top, which hooks onto buttons under the sleeves.


Completed and attached undersleeves.

Just stumbled across your blog, and *love* your wedding gown! :) I'm into living history as well, and since my man and I are planning an 1850's wedding, I'll be making my own dress for it. It'll be styled after Queen Victoria's gown and another 1860's wedding gown.
ReplyDeleteRegards,
Amy
A lot of useful information packed in one post
ReplyDelete