Please note the following- There is no single correct way to make a bonnet. Of the originals I have been privileged to examine or view, there were multiple ways in which they were constructed and covered.
I am making some compromises on this bonnet. I would normally use cane to shape a Regency bonnet and I wouldn't normally use anything on a quilted bonnet. As this is for my 10 month old daughter I am using a soft/flexible millinery wire so that it is more durable. I am using a thin and softer buckram to give form to the quilting. I also usually fully construct the bonnet form and then cover and trim it. As I am quilting this bonnet I will cover it and then construct it. I also rarely fully line a bonnet in silk as it is a waste of fabric that is not seen. Very few of the originals I have examined have been lined.
I am constructing this bonnet and writing this guide while traveling to and from an event. So please excuse my shoddily taken photos.
To start with I cut out the silk with seam allowance.
I also cut buckram and quilters cotton batting without seam allowance.
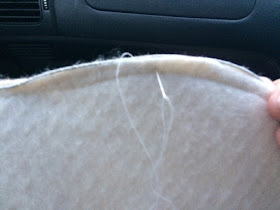
I then basted the batting to the buckram and whip stitched millinery wire to the outside edge of the brim piece.
Normally I would cover the bonnet in silk after constructing the bonnet form. For this bonnet however, I am experimenting with covering the bonnet first with the silk.
I pinned then hand stitched the silk over the brim.
I was constructing this bonnet in the car and I had forgotten both my ruler and calliper. In the end I used a birthday card to draw my quilting lines.
I did have to unpick a few times due to very crooked stitching. Probably from a combination of dodgy lines and moving vehicle. I do NOT recommend this technique at all.
The crown was then only quilted on one side.
Next I constructed the bonnet. I started by joining the back of the brim.
To match the quilting running stitch I used a visible running stitch to attach the crown inside of the brim.
The completed form.
Next I had to decorate the completed form.

I tacked a thin cotton ribbon inside the brim that ties under the child's chin to hold the bonnet on and stabilize it. The outer ribbon is primary decoration
Around the neck section I fan/pleated a decorative ribbon
Using a matching blue silk thread I chain stitched around the outside of the quilting to tidy it up and complete the design.


No comments:
Post a Comment